ฟื้นคืนชีพภาพถ่ายโบราณล้านนาในสีสัน: ภาพถ่ายของหลวงอนุสารสุนทรกิจผ่านการลงสีด้วย AI
ฟื้นคืนชีพภาพถ่ายโบราณล้านนาในสีสัน: ภาพถ่ายของหลวงอนุสารสุนทรกิจผ่านการลงสีด้วย AI
คอลเลกชันภาพที่ได้รับการลงสีและบูรณะโดย AI นี้ ได้รับแรงบันดาลใจจากภาพถ่ายต้นฉบับของ หลวงอนุสารสุนทรกิจ(พ.ศ. 2410–2477 / ค.ศ. 1867–1934)
ช่างภาพอาชีพคนแรกของเชียงใหม่ ผู้บันทึกภาพวิถีชีวิตและแฟชั่นของสตรีล้านนาในอดีต
หลวงอนุสารสุนทรกิจเป็นพ่อค้าที่มีบทบาทสำคัญในเส้นทางการค้าของล้านนาในช่วงปลายศตวรรษที่ 19 และต้นศตวรรษที่ 20 ท่านได้รับการถ่ายทอดความรู้ด้านการถ่ายภาพจาก พระยาเจริญราชไมตรี (จำนง อมาตยกุล) ข้าราชการในเชียงใหม่ผู้เชี่ยวชาญด้านการถ่ายภาพ
ภาพถ่ายของท่านบันทึกวิถีชีวิตของชาวเชียงใหม่ ตั้งแต่ตลาดท้องถิ่นไปจนถึงพิธีกรรมทางศาสนา แสดงให้เห็นถึงการเปลี่ยนแปลงของสังคมล้านนาในช่วงที่เริ่มรับอิทธิพลจากสยาม อังกฤษ และพม่า
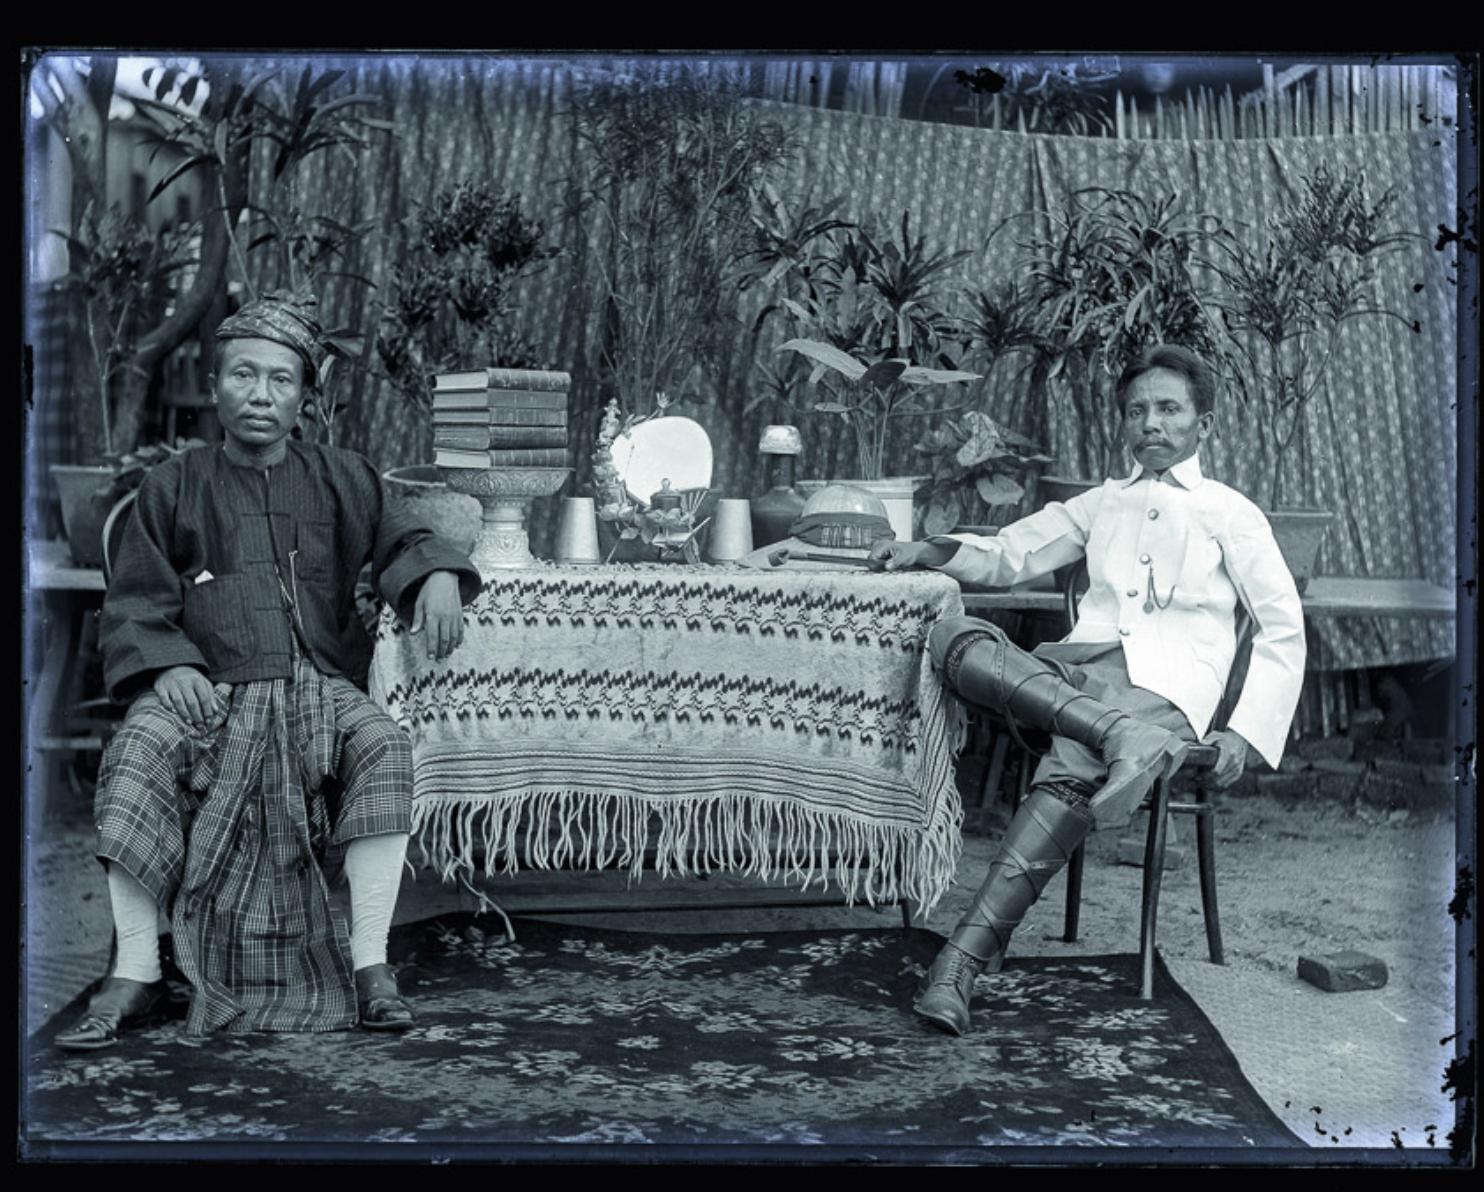
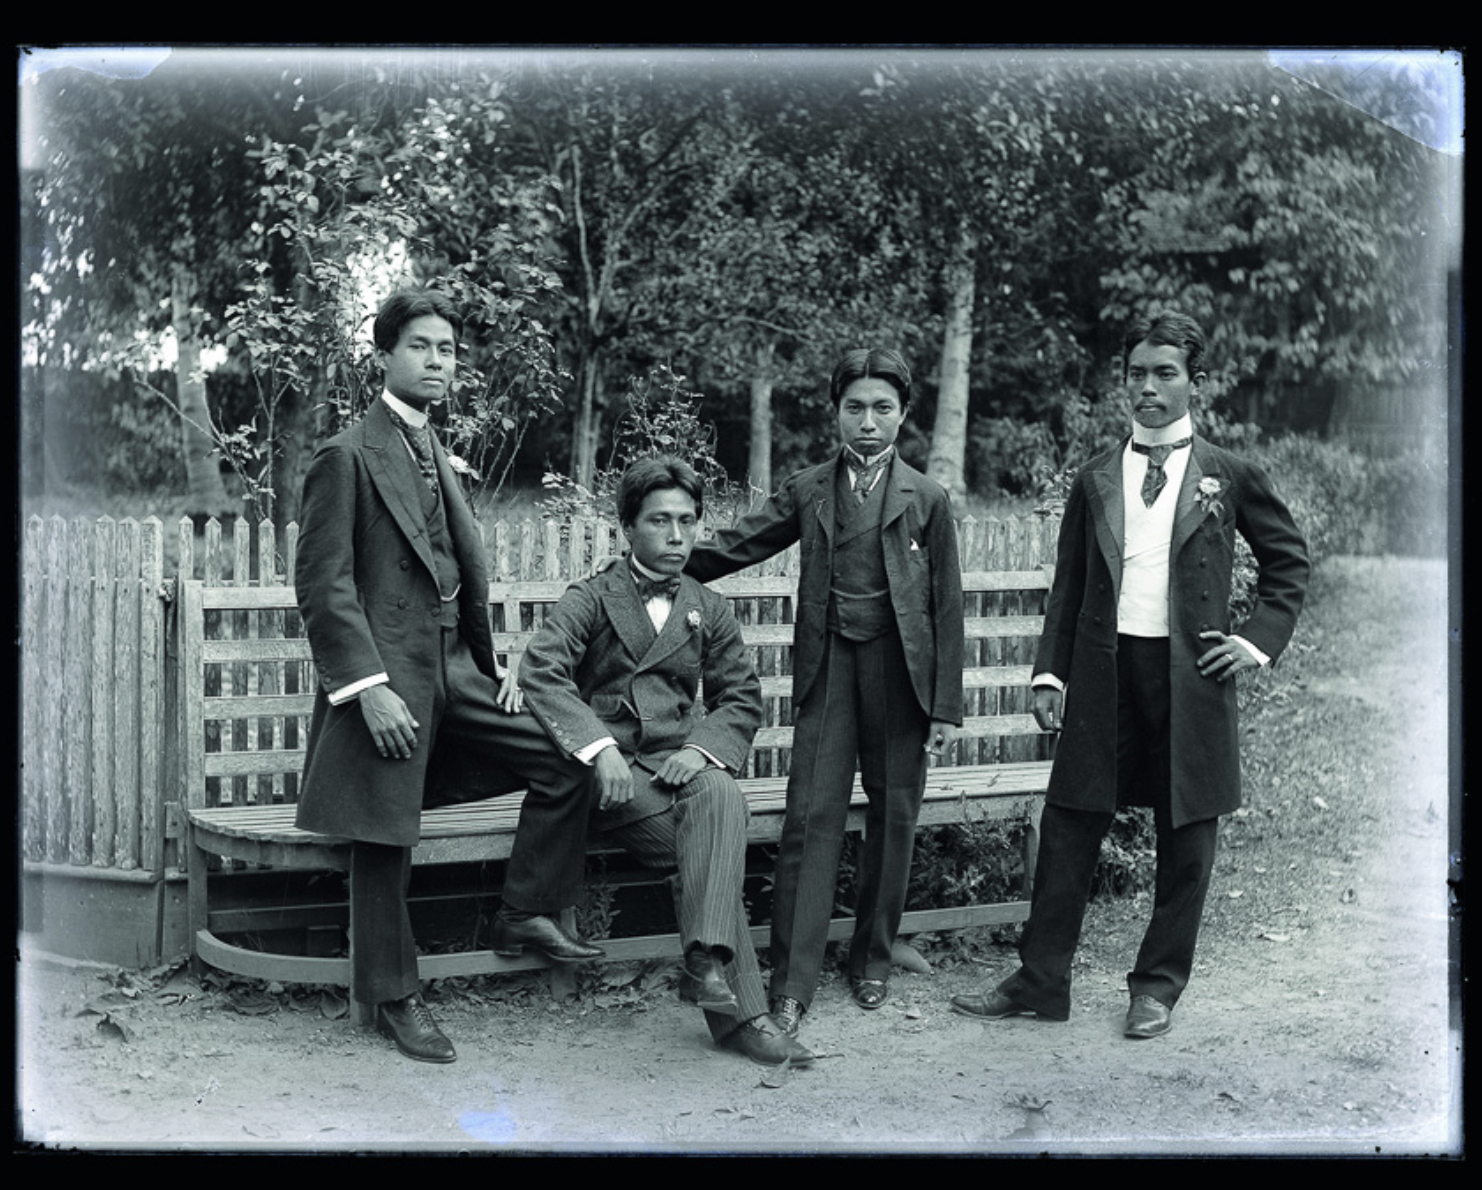
หนึ่งในหัวข้อสำคัญที่ปรากฏในภาพถ่ายของหลวงอนุสารสุนทรกิจ คือภาพของวิถีชีวิตและบุคคลในเชียงใหม่และภาคเหนือ ซึ่งสะท้อนถึงเอกลักษณ์ทางวัฒนธรรมและอัตลักษณ์ของชาวล้านนา
🖌️ “ขั้นตอนการลงสีและฟื้นฟูภาพถ่ายเก่า”
ภาพเหล่านี้ได้รับการลงสีและเพิ่มความคมชัดด้วยการอัปสเกล ซึ่งเพื่อน ๆ ทุกคนสามารถทำได้ไม่ยาก หลายคนอาจมีภาพถ่ายขาวดำเก่าของครอบครัวอยู่แล้ว ก็สามารถลองทำเองที่บ้านได้ครับ
ปัจจุบันเราไม่จำเป็นต้องติดตั้ง ComfyUI หรือตั้งค่า Flux Kontext เองบนคอมพิวเตอร์ให้ยุ่งยากอีกต่อไป เพราะตอนนี้มีเครื่องมือที่ใช้งานง่ายกว่าอย่าง Freepik Edit ซึ่งสามารถเข้าใช้ได้ที่ https://www.freepik.com/pikaso/edit
Freepik Edit ใช้ Flux Kontext Plus ซึ่งเป็นเอนจินสำหรับการปรับแต่งภาพที่พัฒนาโดย Black Forest Lab ซึ่งออกแบบมาเพื่อใช้งานร่วมกับระบบ AI อย่างมีประสิทธิภาพ จุดเด่นของ Flux Kontext Plus คือสามารถรวมเข้ากับแพลตฟอร์มบนเบราว์เซอร์ เช่น Freepik Edit ได้อย่างลงตัว ทำให้ผู้ใช้สามารถลงสีภาพ แก้ไข และอัปสเกลได้โดยไม่ต้องตั้งค่าระบบ ComfyUI หรือใช้งาน GPU เองให้ยุ่งยาก
การลงสีภาพเก่าเป็นขั้นตอนแรกในการทำงานของผม ซึ่งต้องนำภาพถ่ายขาวดำเก่าที่ค้นหามามาลงสี แล้วจึงนำไปใช้เป็นชุดข้อมูล (dataset) สำหรับฝึก LoRA model เพื่อใช้ในการออกแบบงานภาพแฟชั่นไทยย้อนยุค
ต้องบอกก่อนเลยว่า กระบวนการนี้ใช้เวลาค่อนข้างนาน และถ้าอยากให้ได้ผลลัพธ์ที่หลากหลายจริง ๆ เราต้องมีภาพต้นฉบับอย่างน้อย 30–50 รูป เพราะหากภาพน้อยเกินไป เวลาให้ AI สร้างภาพ มันจะวนลูปอยู่กับสไตล์เดิม ๆ ทำให้ขาดความหลากหลาย
แต่เชื่อผมเถอะครับว่าทุกนาทีที่ใช้ในการเตรียมภาพนั้นคุ้มค่าอย่างแน่นอน เพราะเมื่อฐานข้อมูลดี ภาพต้นทางมีความสม่ำเสมอและละเอียด ผลลัพธ์ที่ได้จาก LoRA model ก็จะออกมาสมบูรณ์แบบ ทั้งสี แสง รายละเอียดของเสื้อผ้า และพื้นผิวต่าง ๆ จะดูเป็นธรรมชาติและงดงามยิ่งขึ้น เหมาะสำหรับการนำไปต่อยอดในงานออกแบบหรือการสร้างสรรค์คอลเลกชันภาพย้อนยุคในรูปแบบต่าง ๆ
🖼️ “การลงสีภาพถ่ายขาวดำด้วย Freepik Edit”
ปัจจุบันผมใช้ Freepik Edit ในการลงสีภาพถ่ายขาวดำ เพราะระบบ Flux Kontext Plus ของเขาช่วยให้ขั้นตอนต่าง ๆ ง่ายและสะดวกขึ้นมาก เดิมทีผมใช้ Mac และต้องรัน ComfyUI บน RunPod โดยติดตั้ง Flux Kontext ด้วยตัวเอง ซึ่งค่อนข้างวุ่นวาย ทั้งยังต้องเช่า Pod หรือ GPU แบบรายครั้ง หากไม่ใช้งานต่อเนื่อง ระบบจะตัด Pod ออก ทำให้ต้องติดตั้งใหม่ทุกครั้ง และงานที่ทำไว้ก็อาจสูญหาย
อีกปัญหาคือผมทำงานข้ามหลายอุปกรณ์ —
ที่บ้านใช้ Mac Desktop เวลาถ่ายทำภาพยนตร์ก็ใช้ Mac Laptop และที่ออฟฟิศยังมี Mac อีกเครื่องสำหรับงานออกแบบคอสตูม การติดตั้ง ComfyUI แบบ local จึงไม่ตอบโจทย์ เพราะจะใช้งานได้เพียงเครื่องเดียว ทำให้ไม่คล่องตัวเมื่อต้องทำงานแบบเคลื่อนที่
ทางออกที่ดีที่สุดสำหรับผมในตอนนี้ คือการใช้ Freepik Edit แบบออนไลน์
เพราะสามารถใช้งานได้จากทุกอุปกรณ์ ไม่ว่าจะอยู่บ้าน อยู่กองถ่าย หรือที่ออฟฟิศ ก็สามารถลงสี แก้ไข และขยายภาพได้ครบจบในที่เดียว Freepik Edit ยังมาพร้อมระบบอัปสเกล Magnific Engine ที่ช่วยเพิ่มความคมชัดให้กับรายละเอียดของภาพได้อย่างยอดเยี่ยม
💸 “ทำไม Upscale ถึงต้องจ่ายเงิน? ใช้ Photoshop ฟรี ๆ ไม่ได้เหรอ?”
เพื่อน ๆ หลายคนอาจสงสัยว่า การขยายภาพ (Upscale) หรือการเพิ่มความคมชัดให้กับรูปภาพด้วย AI นั้น ทำไมต้องเสียเงิน? ทำไมไม่ทำเองแบบฟรี ๆ ใน Photoshop ได้?
คำตอบคือ Upscale ในโลกของ AI ไม่ใช่แค่การขยายขนาดของรูปให้ใหญ่ขึ้น เท่านั้น
แต่เป็นกระบวนการ "Enhance" หรือสร้างรายละเอียดใหม่ ให้กับภาพ โดยอิงจากฐานข้อมูลเดิม เช่น
เพิ่มลวดลายผ้า เช่น ลายปัก ยกดิ้นเงิน ดิ้นทอง
เพิ่มรายละเอียดของใบหน้า เช่น หนวด ริ้วรอย หรือความอ่อนเยาว์
เปลี่ยนชาติพันธุ์ของตัวละคร
หรือแม้แต่แปลงเพศ เปลี่ยนอารมณ์ และปรับบุคลิกภาพได้อย่างสมจริง
ดังนั้น การ Upscale ด้วย AI จึงไม่ใช่แค่การ "ขยายรูป" แต่คือการ "สร้างภาพใหม่ที่สมบูรณ์ยิ่งขึ้น" โดยอิงจากภาพต้นฉบับ
⚖️ “Freepik Edit vs Magnific — ใช้อะไรดี?”
การใช้ Freepik Edit หรือ Magnific Upscale ก็ต้องเข้าใจว่า ทั้งสองระบบมี engine และพารามิเตอร์ที่เหมือนกัน แต่ตัวเลือกของ engine นั้น มีหลายตัว เราต้องทดสอบว่าแต่ละ engine นั้นให้ผลลัพธ์ในการ Upscale แตกต่างกันอย่างไร
สิ่งสำคัญคือการเตรียมภาพให้เหมาะสม เช่น ควรใช้ภาพต้นฉบับที่มีด้านสั้นไม่เกิน 1,000 พิกเซล เพื่อประหยัด token
ภาพที่มาจาก Midjourney สามารถนำไปใช้ได้ทันที เช่น:
ภาพอัตราส่วน 2:3 (AR 2:3) = 896 x 1344 พิกเซล
ภาพอัตราส่วน 1:1 (AR 1:1) = 1024 x 1024 พิกเซล
ภาพเหล่านี้เหมาะสมกับทั้ง Freepik และ Magnific โดยไม่ต้องย่อหรือแปลงขนาดก่อน
💰"เทียบค่าใช้จ่าย (Token Consumption)"
Magnific: ถูกที่สุด คิดเพียง 5 token ต่อครั้ง
โดยแพ็กเกจพื้นฐานจะได้รับ 2,500 tokens
ดังนั้นสามารถอัปสเกลได้ประมาณ 500 รูป
Freepik: คิด 90 token ต่อครั้ง
โดยแพ็กเกจจะได้รับ 45,000 tokens
สามารถอัปสเกลได้ประมาณ 500 รูป เช่นเดียวกัน (ถ้าใช้ขนาดภาพตามที่ผมแนะนำ)
เมื่อเทียบกันแบบตัวเลข จะเห็นว่า ทั้งสองระบบให้จำนวนภาพที่อัปสเกลได้เท่ากัน แต่สิ่งที่แตกต่างกันคือ ความสามารถเพิ่มเติมในการจัดการภาพ
🖌️ "จุดเด่นของ Freepik Edit"
อัปสเกลภาพแบบ Batch ได้ครั้งละ 20 รูป
มีฟังก์ชันเสริมครบ เช่น
✅ การลงสี (Colourise)
✅ การลบพื้นหลัง (Background removal)
✅ การปรับแต่งรายละเอียดเฉพาะจุด (Retouch)
✅ การปรับแสง สี และขนาดภาพ
ขณะที่ Magnific ทำได้เพียงอย่างเดียวคือ Upscale ทีละรูป และ ไม่มีฟังก์ชันแก้ไขใด ๆ
✅ "สรุป: ถ้าเน้นความคุ้มค่า + ความสะดวก = Freepik Edit"
หากต้องการเพียงแค่ Upscale อย่างเดียว และไม่ต้องการปรับแต่งอะไรเพิ่มเติม Magnific อาจเป็นตัวเลือกที่ประหยัดที่สุด แต่ถ้าต้องการความสะดวก ความเร็ว และความสามารถในการจัดการหลายรูปพร้อมกันในหนึ่ง workflow — Freepik Edit คือทางเลือกที่ครอบคลุมกว่า และคุ้มค่ากว่าครับ
🧭 “วิธีใช้งานเบื้องต้น”
เข้าไปที่ฟังก์ชัน Edit แล้วอัปโหลดภาพขาวดำที่ต้องการลงสีเข้าไป จะมี 5 ออฟชันให้เลือก ได้แก่ Retouch, Resize, Upscale, Background และ Adjust
ไม่ต้องกดอะไรเลยครับ เพราะสิ่งที่เราจะทำคือการเปลี่ยนสีภาพ เราแค่พิมพ์เริ่มต้นว่า “Colourise this image…” แล้วอธิบายต่อว่าเราต้องการให้เสื้อผ้าและส่วนต่าง ๆ ของรูปเป็นสีอะไร สิ่งที่คูลมาก ๆ คือ เราสามารถใส่หมายเลขสี Pantone เป็นเรฟเฟอเรนซ์ได้เลยครับ
💬 “ตัวอย่าง Prompt:”
ภาพแรกของโพสต์นี้ เป็นรูปครอบครัวต่างวัฒนธรรม พ่อเป็นคนจีน ยังไว้ผมเปียอยู่เลยครับ และแม่น่าจะเป็นหญิงชาวเชียงใหม่
นี่คือตัวอย่าง prompt ที่ผมใช้:
"Colourise this image as follows: the men are wearing navy round-neck shirts in Pantone 280 C and navy trousers in Pantone 282 C. The ladies are dressed in white blouses, yellow body wraps in Pantone 0131 C, and red horizontal skirts in Pantone 187 C with black hems in Pantone Black C. The cloth hanging in the background is blue in Pantone 286 C and gold in Pantone 124 C. The pillow on the floor is pastel pink in Pantone 707 C. Make the overall photo clean and visually balanced."
ถ้ารูปยังไม่ดีเท่าที่ต้องการ ก็สามารถใช้ Retouch เพื่อแก้ไขแต่ละจุด แล้วค่อยกด Upscale เพื่อให้ภาพและรายละเอียดของเสื้อผ้าคมชัดขึ้นอีกระดับ
📌 สรุป
ภาพที่ได้รับการลงสีและบูรณะโดย AI ในคอลเลกชันนี้ ไม่ใช่เพียงการฟื้นฟูภาพถ่ายขาวดำให้มีสีสัน แต่คือการปลุกชีวิตให้กับประวัติศาสตร์ ผ่านสายตาและเทคโนโลยีของยุคปัจจุบัน นี่คือการรำลึกถึงผลงานของ หลวงอนุสารสุนทรกิจ ที่ไม่เพียงเป็นผู้บันทึกภาพวิถีชีวิตของชาวเชียงใหม่ในอดีต แต่ยังเป็นแรงบันดาลใจให้เรานำมรดกวัฒนธรรมล้านนากลับมาเล่าใหม่ในภาษาของโลกดิจิทัล
AI ไม่ได้มาแทนอดีต — แต่เป็นเครื่องมือที่ช่วยให้เรามองเห็นอดีตชัดเจนขึ้น และต่อยอดไปสู่อนาคตด้วยความเคารพ ในทุกเฉดสีที่เราใส่กลับไปในภาพ คือการเติมเต็มความทรงจำของผู้คนที่เคยมีชีวิตอยู่จริง และเป็นเสมือนการเฉลิมฉลองอัตลักษณ์ล้านนาที่ไม่เคยเลือนหายไป
Reviving Lanna in Colour: The AI Restoration of Luang Anusarn Sunthornkit’s Photographs
This AI-enhanced and colourised image collection is inspired by the original photographs of Luang Anusarn Sunthornkit (1867–1934),
the first professional photographer of Chiang Mai, who documented the daily lives and traditional fashions of Lanna women in the past.
Luang Anusarn Sunthornkit was also a merchant of considerable influence in Lanna’s trade network during the late 19th and early 20th centuries.
He learned the art of photography from Phraya Charernrat Maitri (Jamnong Amatyakul), a civil servant in Chiang Mai and a skilled photographer himself.
His photographs recorded the lives of Chiang Mai residents — from bustling local markets to religious rituals — capturing the social transformations of Lanna society as it began to absorb influences from Siam, Britain, and Burma.
One of the most remarkable themes in his work is the portrayal of daily life and the people of Chiang Mai and Northern Thailand,
reflecting the distinctive culture and identity of the Lanna region.
Colourising and Restoring Old Photographs
These images were colourised and upscaled for clarity — a process that anyone can try at home. Many people already have old black-and-white family photos, and with today’s tools, restoring them is easier than ever.
Nowadays, there’s no need to install ComfyUI or manually set up Flux Kontext on your computer. A much more convenient option is Freepik Edit, which you can access at: https://www.freepik.com/pikaso/edit
Freepik Edit uses Flux Kontext, an AI-based image editing engine developed by Black Forest Lab. It is designed to work seamlessly with web-based platforms, enabling users to colourise, retouch, and upscale images without dealing with technical setups or configuring GPUs manually.
For me, colourising old photographs is the first and most important step in my creative process. I start by collecting and colourising vintage black-and-white images, which I then use as a dataset for training a LoRA model — a technique I rely on to design Thai historical fashion visuals with greater accuracy.
I should say upfront: this process takes time. To achieve truly diverse and high-quality results, you’ll need at least 30–50 original images. If the dataset is too small, the AI tends to loop within the same visual style, leading to repetitive and limited outputs.
But trust me — every minute spent preparing images is absolutely worth it. A strong, consistent dataset yields stunning results from a LoRA model:
natural colours, accurate lighting, rich garment textures, and realistic surface details. The final images are not only beautiful but also highly suitable for design projects or building stylised vintage image collections.
Colourising Black-and-White Photos with Freepik Edit
Currently, I use Freepik Edit to colourise black-and-white photographs because its Flux Kontext Plus system makes the process much simpler and more intuitive.
Previously, I had to run ComfyUI on RunPod via Mac and install Flux Kontext manually — a time-consuming and often frustrating setup that also required renting a Pod or GPU. If I didn’t use it frequently enough, the system would automatically cut the session, forcing me to reinstall everything and lose previous work.
Another challenge is that I use multiple devices: at home, I work on a Mac Desktop; during film productions, I use a Mac Laptop; and at the office, I have another Mac for costume design. Installing ComfyUI locally works on only one machine — which is not ideal for someone working across locations.
That’s why Freepik Edit is now my go-to solution. It’s web-based, so I can access it from anywhere and from any device — home, film set, or design studio. The app allows me to colourise, retouch, and upscale images all in one place. It also features the Magnific Engine, which enhances fine details and image clarity beautifully.
Why Pay for Upscale? Can’t You Just Use Photoshop for Free?
Many people ask: why pay for AI upscale? Why not just enlarge the image in Photoshop for free?
The answer is that AI upscale is not merely about enlarging the image — it’s about enhancing it. It intelligently generates new details based on the original input, allowing for creative transformation, such as:
Adding intricate patterns (embroidery, silver/gold-threaded cloth)
Enhancing facial details like beards, wrinkles, or youthful skin
Changing ethnicity or cultural appearance
Even gender-swapping or facial expression transformations
In other words, AI upscale is not just “making it bigger” — it’s “making it better” with realism and creativity.
Freepik Edit vs. Magnific — Which Should You Use?
When using Freepik Edit or Magnific Upscale, it's important to understand that while both platforms use similar engines and parameters, they offer multiple engine options. You’ll need to experiment to see how each engine produces different results when upscaling images.
For best results, I recommend uploading images with a shortest edge under 1,000 pixels to save on tokens.
Images from Midjourney work perfectly with both systems. For example:
AR 2:3 (896 x 1344 px)
AR 1:1 (1024 x 1024 px)
No resizing needed — both apps accept these dimensions directly.
Token Cost Comparison
Magnific: the most affordable option — only 5 tokens per upscale
(with a 2,500-token pack, you can upscale about 500 images)Freepik: costs 90 tokens per upscale,
but offers a token pack of 45,000 tokens — also roughly 500 images if optimised as I recommend
So in practical terms, you get the same number of upscaled images from both services.
But here’s where Freepik shines:
Key Advantages of Freepik Edit
Batch upscale: 20 images at once
Additional tools:
✅ Colourisation
✅ Background removal
✅ Retouch tools
✅ Image adjustments
In contrast, Magnific can only upscale one image at a time, with no editing features whatsoever.
Verdict: Freepik Edit Offers More Versatility
While Magnific is cheaper per use, Freepik Edit offers far greater flexibility.
Its all-in-one interface supports more complex workflows — from colourisation and retouching to dataset preparation for LoRA model training.
If you only need to upscale a few images quickly, Magnific is perfectly fine.
But if you want a creative studio in your browser — I recommend Freepik Edit.
Quick Start Guide
Open the Edit function in Freepik
Upload your black-and-white photo
You’ll see five options: Retouch, Resize, Upscale, Background, and Adjust
You don’t need to click anything — just type a prompt starting with: “Colourise this image…” and describe how you’d like the clothing and details coloured.
What’s really cool is that you can even include Pantone colour codes for precision!
Sample Prompt
The first image in this post shows a multicultural family.
The father is Chinese — still wearing his braided queue hairstyle — and the mother appears to be a Lanna woman from Chiang Mai.
Here’s an example of the prompt I used:
"Colourise this image as follows: the men are wearing navy round-neck shirts in Pantone 280 C and navy trousers in Pantone 282 C. The ladies are dressed in white blouses, yellow body wraps in Pantone 0131 C, and red horizontal skirts in Pantone 187 C with black hems in Pantone Black C. The cloth hanging in the background is blue in Pantone 286 C and gold in Pantone 124 C. The pillow on the floor is pastel pink in Pantone 707 C. Make the overall photo clean and visually balanced."
If the image doesn’t come out perfect the first time, you can always use Retouch to tweak individual areas, and then use Upscale to sharpen the final result — especially the clothing details.
Conclusion
This AI-enhanced image collection is more than just a colourisation of vintage black-and-white photographs — it is an act of bringing history back to life through the lens of modern technology. It serves as a heartfelt tribute to Luang Anusarn Sunthornkit, not only a documentarian of Chiang Mai’s past, but also a silent collaborator in reviving Lanna heritage for the present day.
AI does not replace the past — it helps us see it more clearly and continue its story with reverence. With each brushstroke of colour we return to these images, we honour the memories of real people who once lived, and celebrate a cultural identity that remains deeply rooted in the soul of Northern Thailand.
#aifashionlab #AI #aiartist #aiart #aifashion #aifashiondesign #aifashionstyling #aifashiondesigner #fashion #fashionhistory #historyoffashion #fashionstyling #fashionphotography #digitalfashion #digitalfashiondesign #digitalcostumedesign #digitaldesign #digitalaiart #ThaiFashionHistory #ThaiFashionAI